
“Help Me Decorate My Space!”
Read on as Jostar’s very own Marketing Director, Stephanie, goes through the Jostar interior design process, talks about her experiences, and transforms her space from a mishmash of styles to a mid-century modern marvel.
“Wanting to learn more about the Jostar process I signed up as a paying customer to get expert advice on decorating my space. I paid in full for the services as a customer and received no cash or equivalent compensation for my experiences. I wanted to share my experience with potential customers to give insight into a decorating interior design experience. Enjoy!”
- Stephanie
My Living Room
About Me
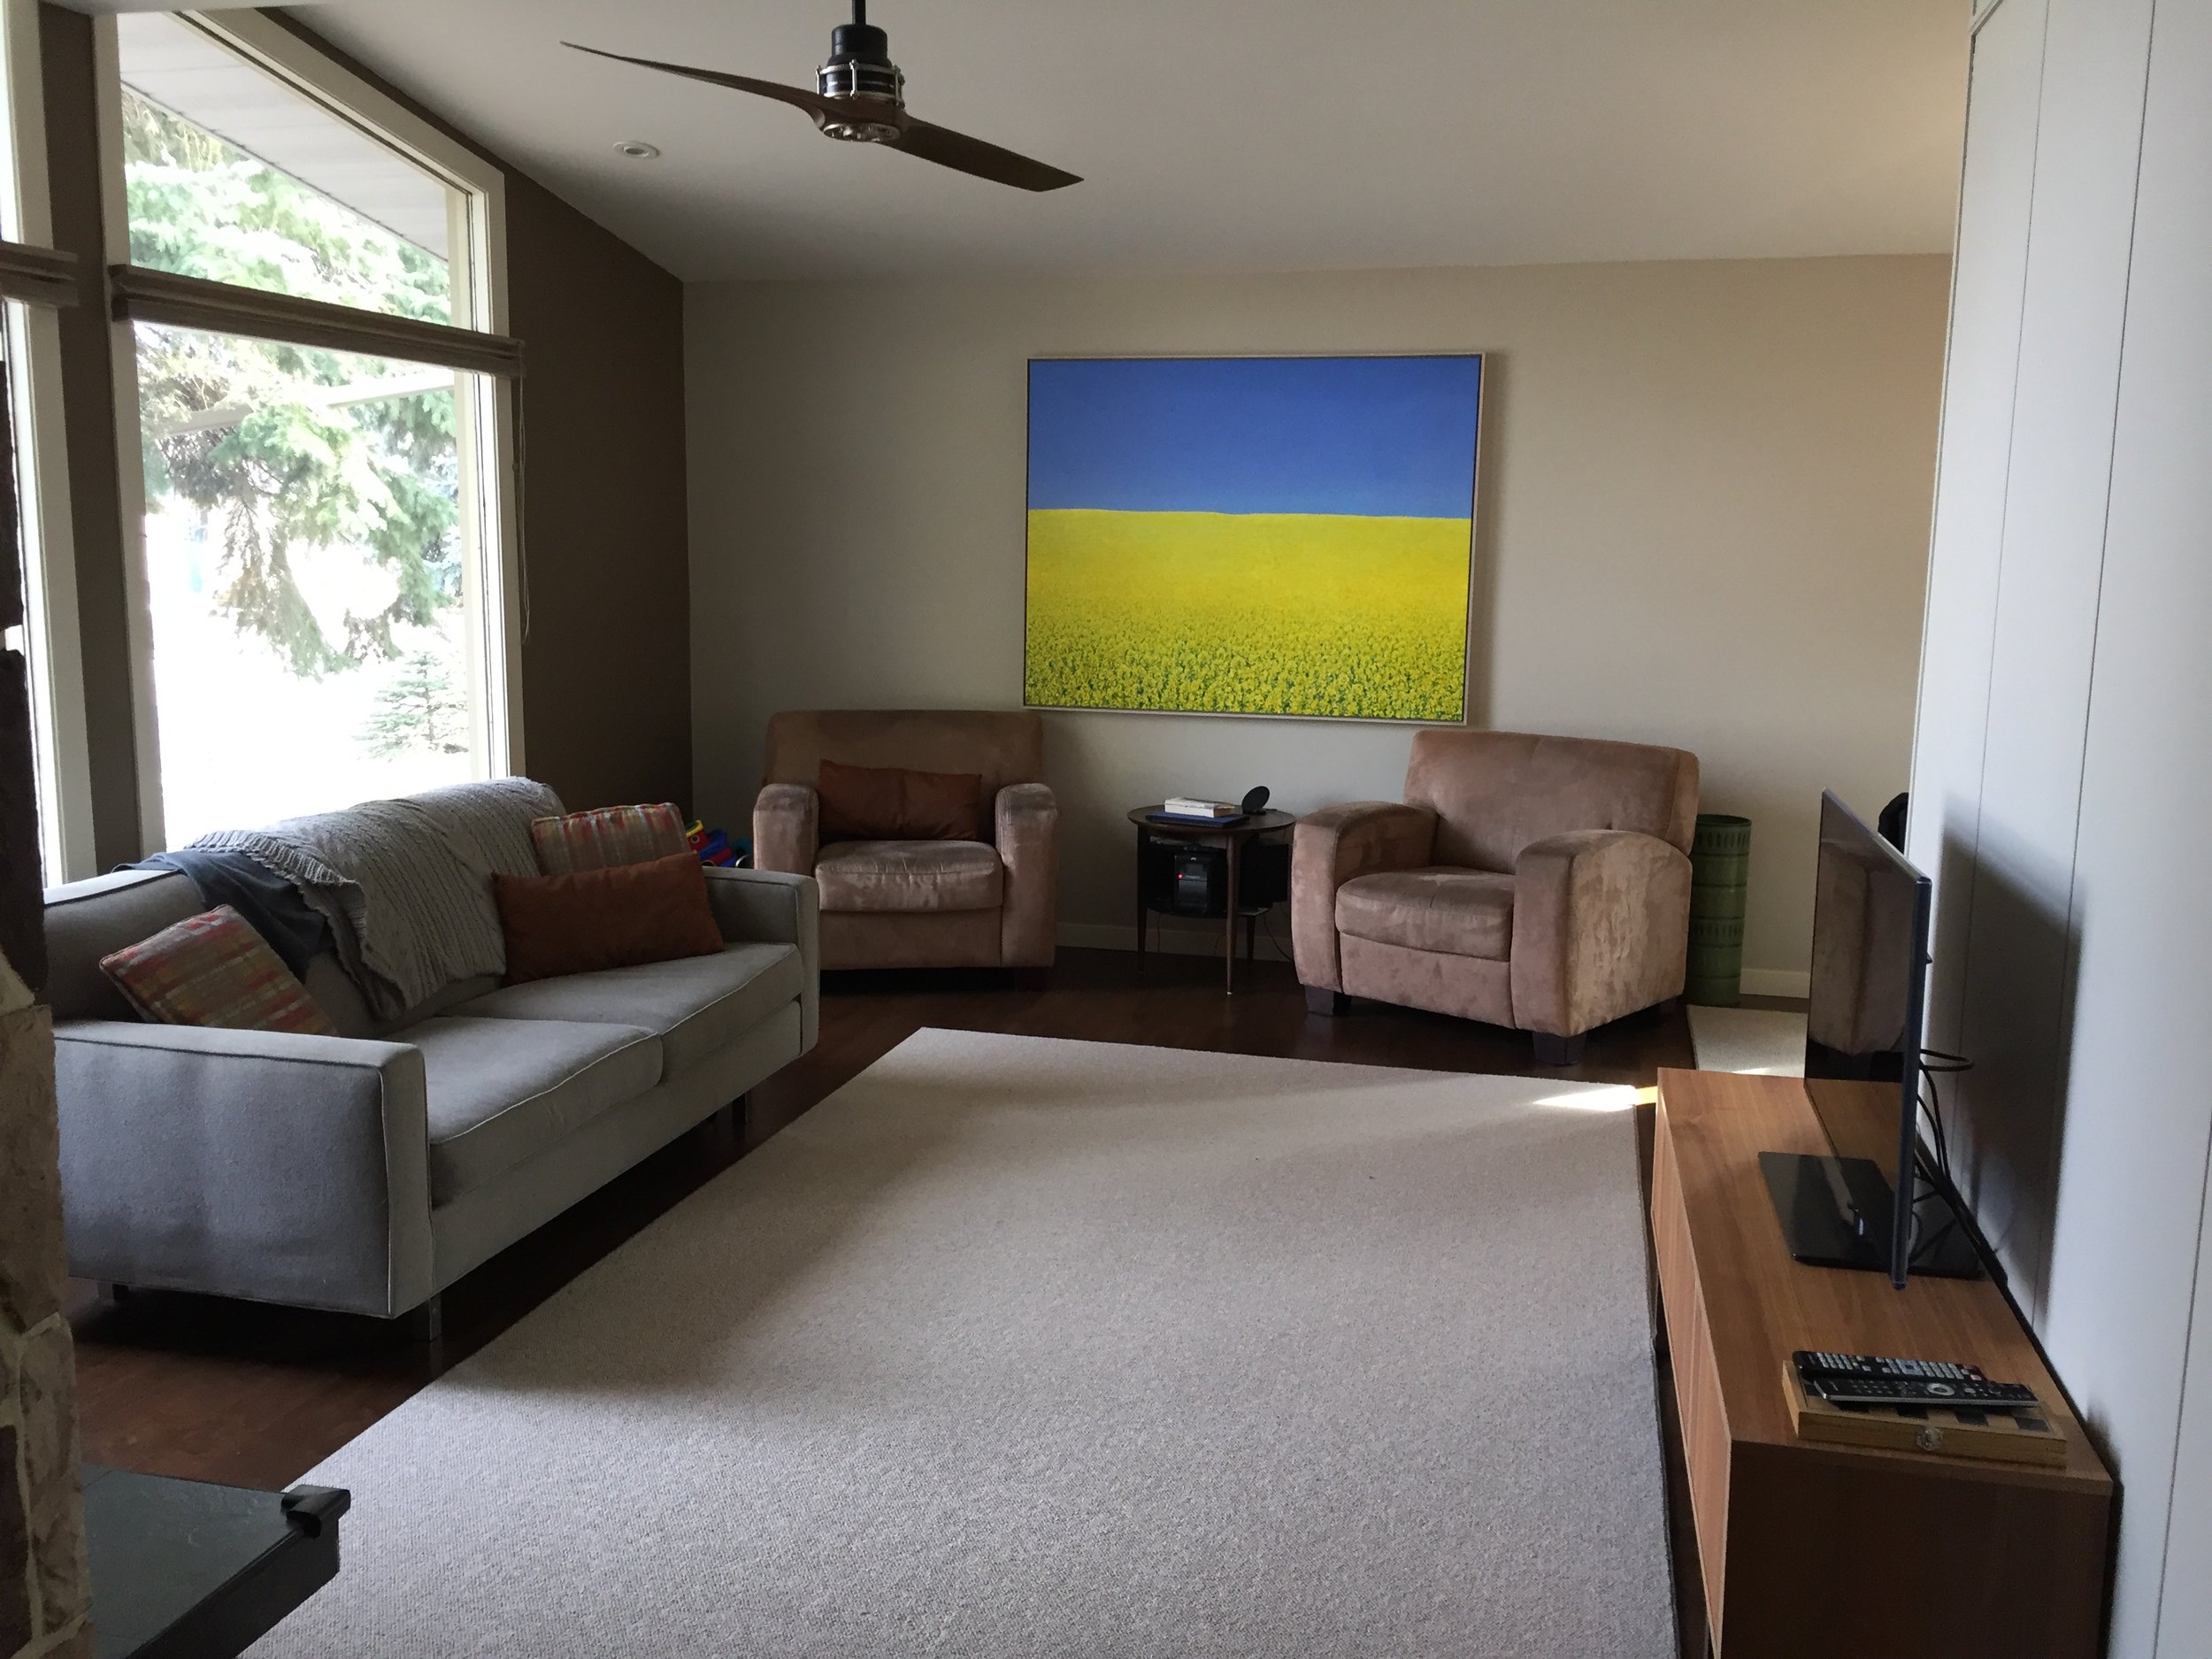
My husband and I own a 1960s A-frame bungalow in a fantastic neighborhood that we have lovingly renovated for the past several years. The home is exactly what we want and looks nothing like it did when we moved in 13 years ago (no more orange shag on the walls!). We are a busy family with 2 kids and careers, and since we completed all the “heavy lifting” and the financial investment required to re-do an older home we sort of stopped at the final stage of decorating the house. Most of our furniture is what we brought with us when we got married 11 years ago.
I have a genuine love for all things Mid-Century Modern — teak, walnut, minimal furniture with clean lines, orange, green, yellow, turquoise… oh my! One of the things I especially love about this period/style is the efficient design and layout of smaller spaces. Our 3-bedroom home is 1450 sq ft. and we only have so much space to work with. As a family of 4 who also entertains, room for everyone to sit, move around, and enjoy the space is important to us.
It was a timely coincidence that I was facing some design challenges at home that I came to work at Jostar Interiors. Signing up for an Initial Design Consultation and getting some much needed help while documenting my experiences became one of my top priorities. I am excited to share my journey with you!
Step 1: My Design Challenges and Initial Consultation
Getting Ready for the Consultation
After I signed up for my Initial Design Consultation, I received a package on how to prepare for my consultation and worksheet to get me started. I appreciated having a tool to guide me and it really helped me focus on what I wanted to cover in the consultation and identify the areas I was struggling with. As part of my preparation, I created a Pinterest Board with some furniture, colors, and finished spaces I liked to give the designers an idea of my style. I also collected some of my favorite design magazines to bring along.


My Design Challenges
As I made my way through the worksheet and really examined my space, several challenges I needed help with came to the forefront:
Space planning and more seating: With an L-shaped dining/family room it had been hard to find a good furniture arrangement that allowed for enough seating but maintained the flow needed for people to move around unobstructed from one space to the next. My husband works from home often on the couch and the kids use the family room as place to play. The space has to work for many different uses.
Furniture size: Since we had a mishmash of items from different places we had lived in, some pieces felt too big for the space, and some too small. Nothing really felt like it was right for our space. I had shied away from buying anything new as I didn’t know how it would look in my space or if it would be the right size — I didn’t want to make a mistake and live with something that didn’t work.
Vintage Pyrex display: I collect Vintage Pyrex — yes, it’s a thing! — and I love how a Pyrex collection looks when it is all displayed together. My collection was scattered throughout the house and didn’t really have a place to “live”. I love seeing the pieces I have and wanted a main floor display solution and to give them a home.
More lighting: Basically we had two sets of overhead lights — one over the dining room table and the other over the couch. Sometimes, especially in the winter or grey days, that part of the house can feel dark even with the large windows. It would be nice to have a few extra lights to turn on.
Step 2: At the Initial Design Consultation

Designers in Action!
Before the designers arrived I had my iPad out with my Pinterest board up, my stack of magazines, and the worksheet I had completed. When designers Joanna and Ashley arrived they started off by reviewing my worksheet to get an understanding of what my challenges were and what I wanted to focus on during my design consultation. After, we had a walk through the house so they could get an idea of the whole space and focused on two primary areas I wanted to work on — the L-shaped living/dining room.
They took lots of notes and asked lots of questions — I appreciated that while I had done lots of prep work they were looking at the problems with a designer’s eye and really working to find some creative solutions and applying their design experience. Throughout the design consultation they provided me with tips and advice on changes I could make or things to consider. They were always checking to see if their ideas worked for me and really tailoring a solution that would not only meet my needs but that I would like in the end as well.
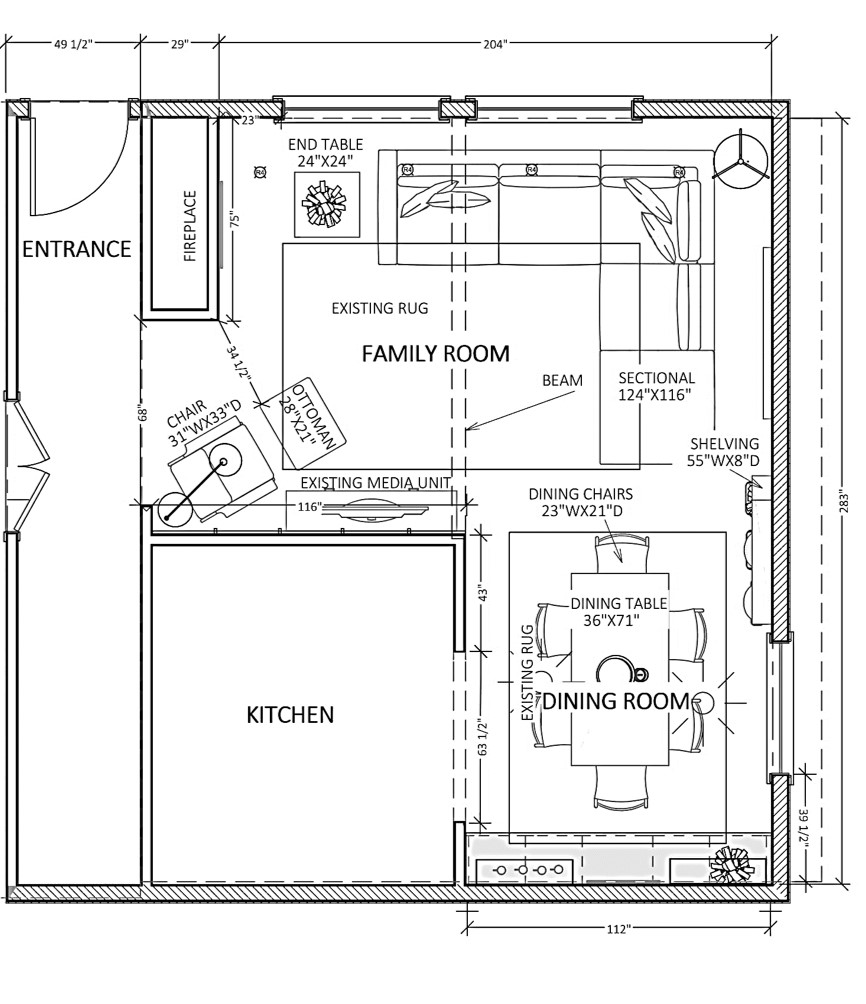
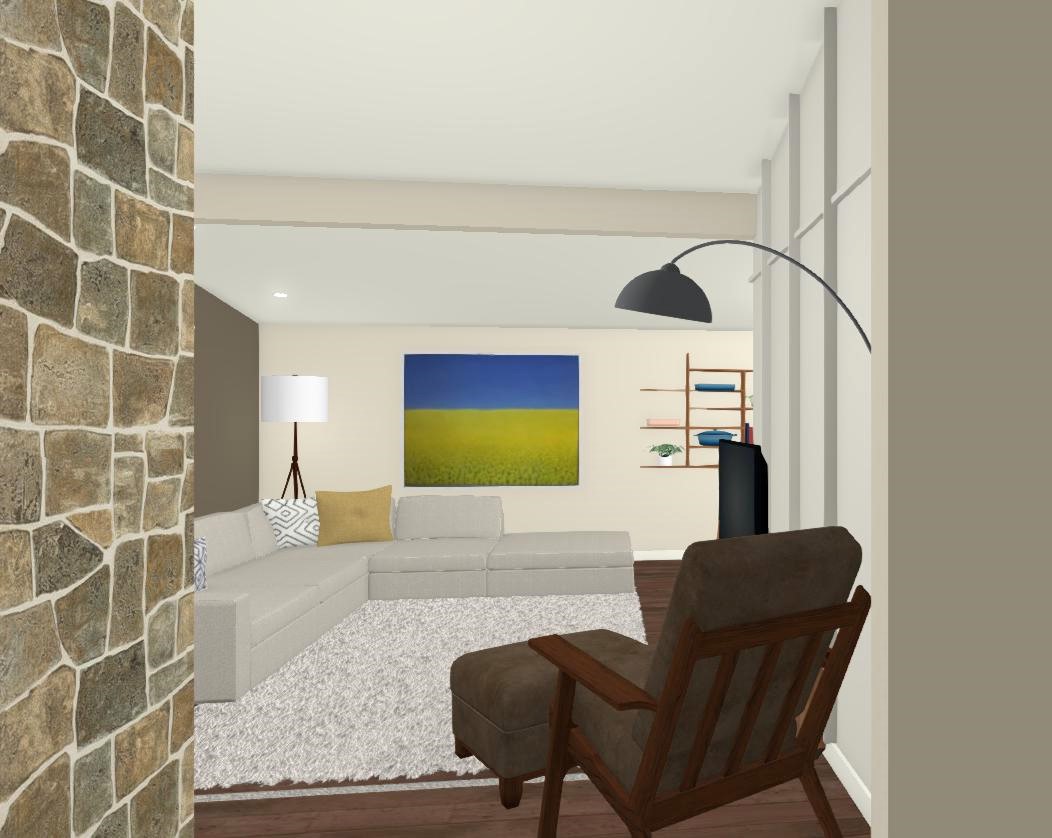
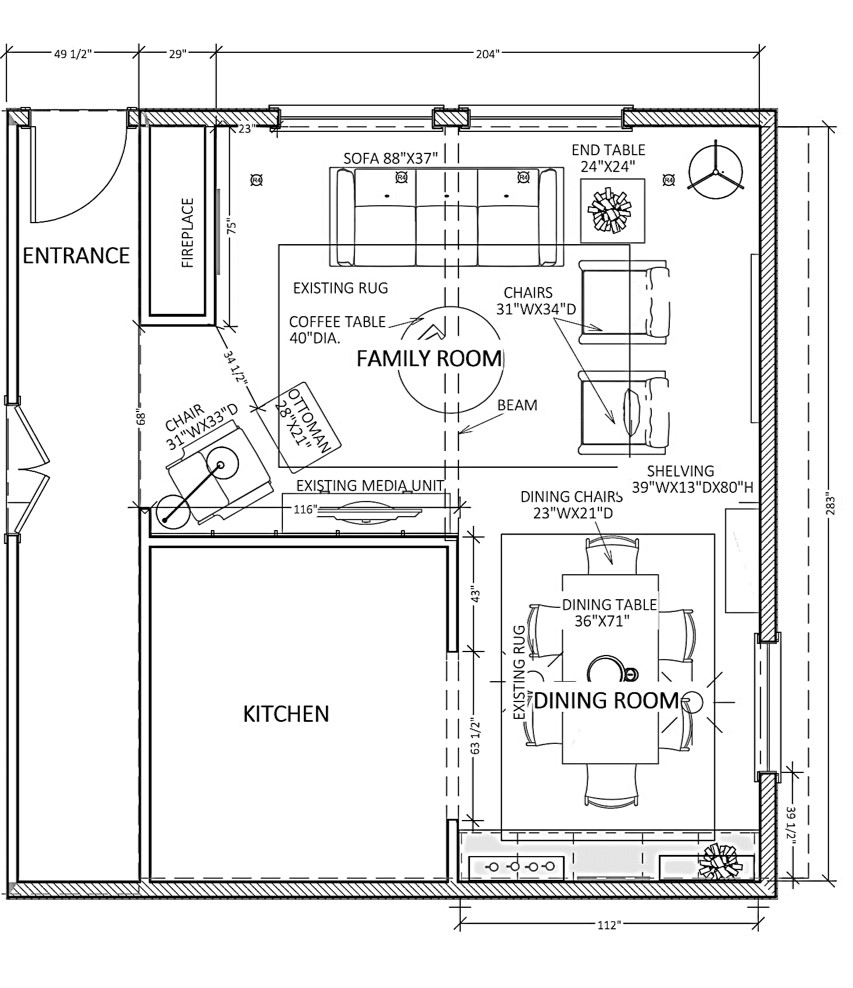
After our walk through, we sat down and went through some of the images I had brought and talked about what I liked and didn’t like design-wise. They made a floor plan sketch of the space and took lots of measurements of the space and of the items which I would be keeping in the design plan — like the rugs. There were a lot of measurements!
Step 3: Picking A Design Package
At the end of the initial consultation, they took me through Jostar’s three design package options and what each had to offer. In the end I settled on a custom Silver Design package that included the following elements:
Space Plan — 2 options
3D rendering of the space for each option in colour
Design presentation meeting with one set of changes
I chose this package as it would allow me to visually see the space, have an understanding of the overall layout, and give me the furniture measurements to ensure what I picked out would fit the space. I wanted to be able to add new furniture along the way but with the big picture in mind, this would give me the road-map to do it.
Ashley let me know I could expect to have my design presentation meeting with the space plan and rendering 7 to 10 working days after my initial consultation and that she would follow-up to set up a time when it was ready.
Step 4: The Jostar Solution
When my design was ready, Jostar Interiors set up another meeting with me to present the concepts. I was surprised at the package I received — there were so many views and images to give me a great idea of what the finished space would look like.
First, Ashley took me through my existing floor plan and some of the problems we had discussed solving as well as two inspiration pages with examples of furniture that would fit in to the design and the space. Based on the Pinterest boards I created and the magazines I brought, Ashley was able to really understand my design style and got it right when she put together the inspiration pages. She listened to what I liked and made it into a cohesive look.
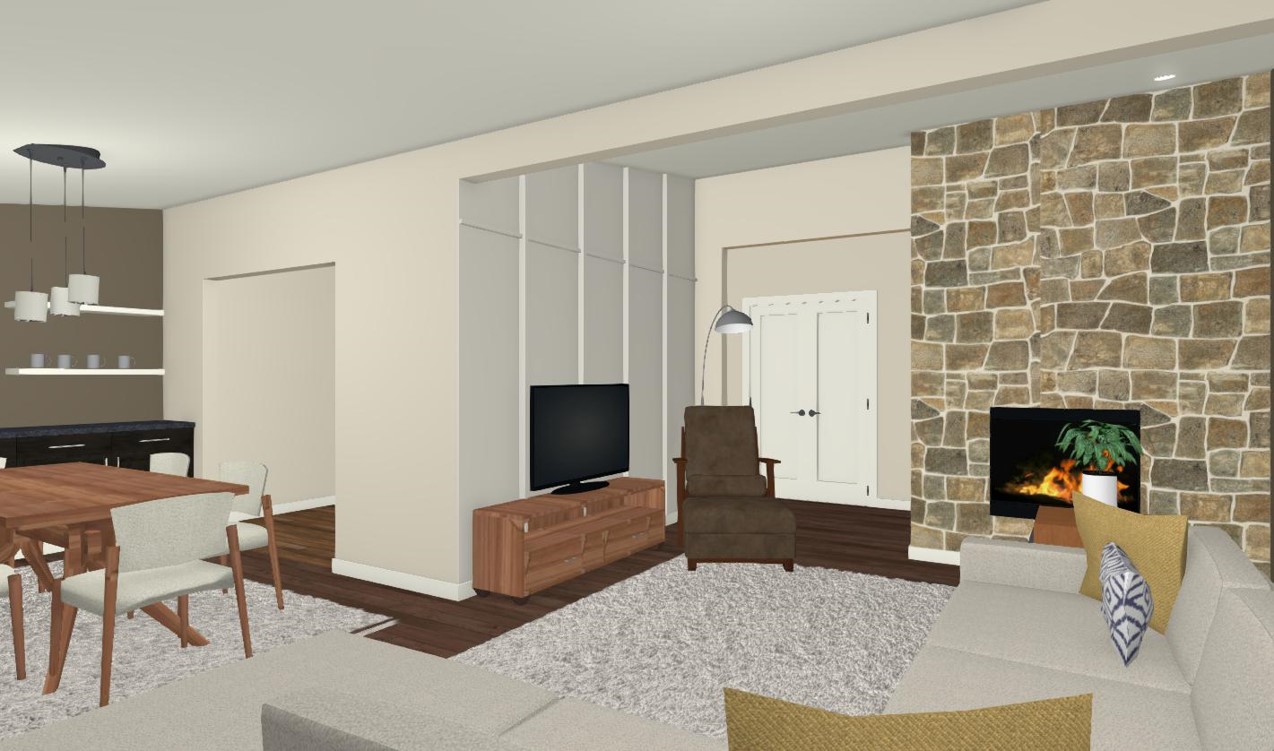
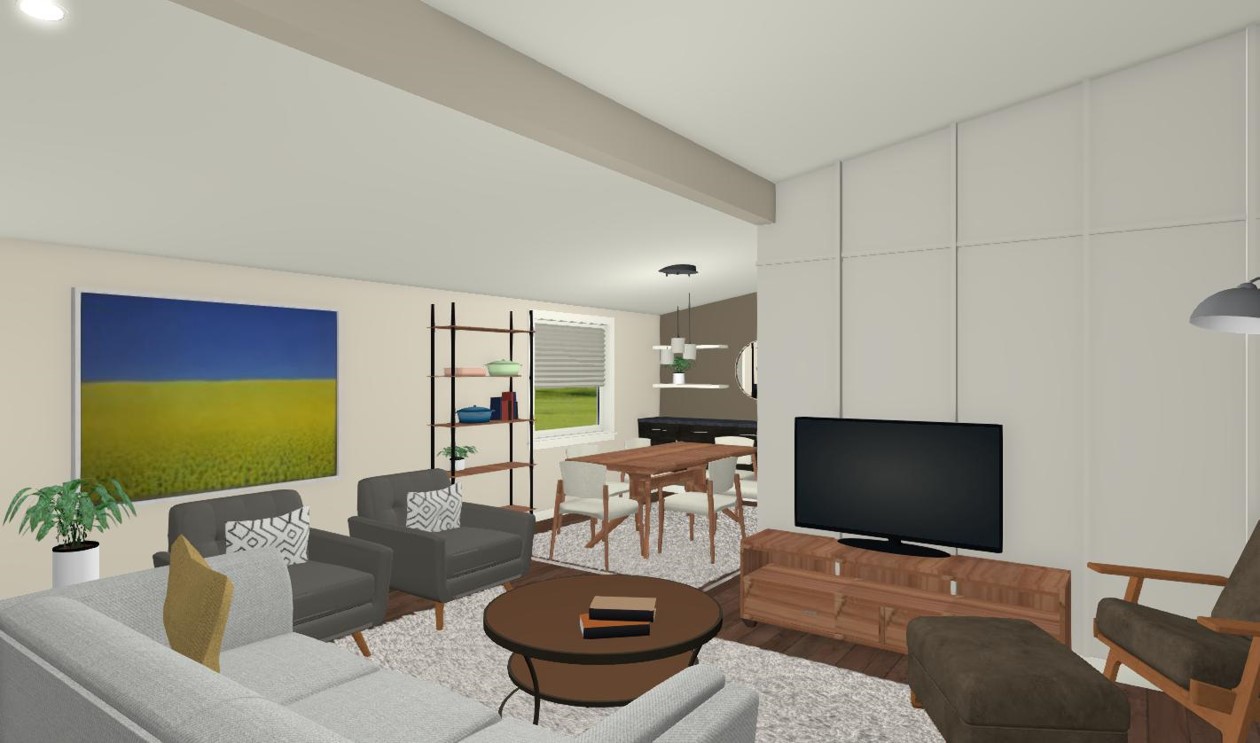
Next, she moved on to the design concepts. Each concept came with a floor plan with furniture and sizes and seven to eight 3D images from different points of view throughout the room. I was able to see what the space would look like from every angle. Ashley walked me through each plan and discussed how the overall design would work, ideas for types and style of furniture, and how the overall space would function. I was surprised Ashley had even clipped my artwork from of the photos and added it into the 3D designs — it really was my home!
As we made our way through all the visuals I had three significant “WOW” moments which just made sense for the space:

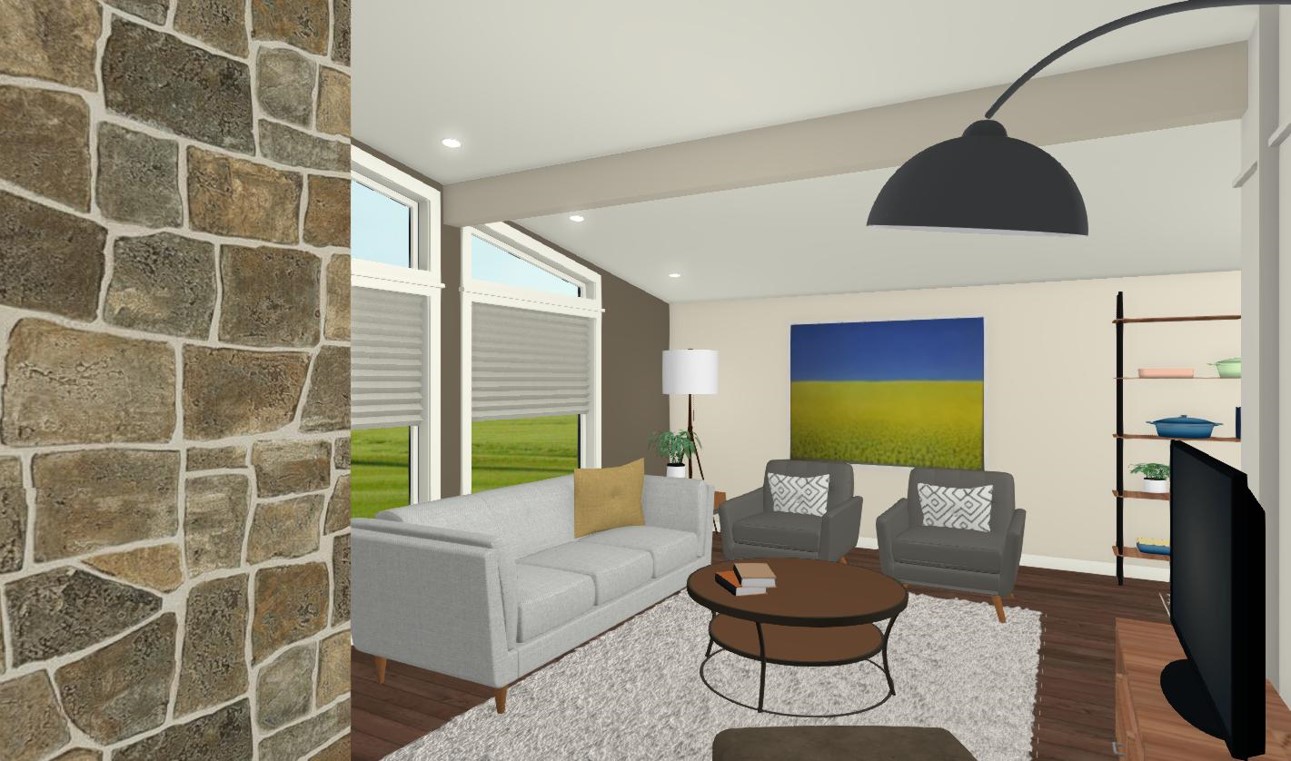
So much seating with a sectional
WOW moment #1: A large custom sectional with movable ottoman
As soon as a large sectional with a movable storage ottoman on the end was suggested it totally made sense. It would significantly increase the amount of seating in the area and when we have large groups at the dining table it could be moved out of the way to allow for the table to expand and still have room to move around the table. Ashley suggested with a custom-made sectional we would have it and the ottoman the exact size we wanted and could also incorporate storage in the ottoman for kids’ toys — yes please! Since we opted not to have a coffee table as the kids could still use this area to play in, the ottoman can double when needed, as an impromptu coffee table just by placing a tray on it to serve food and drinks. I couldn’t believe how functional this idea was and how many different ways we would be able to use it.

Lots of display space but out of the way
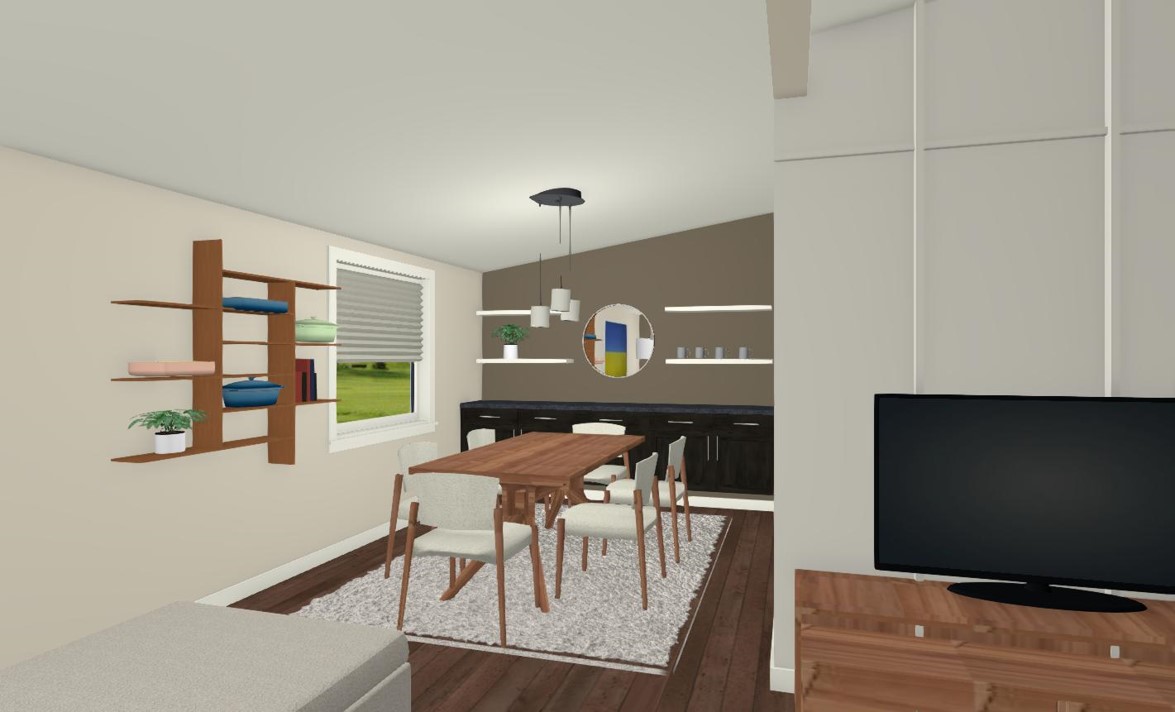
WOW moment #2: A wall-mounted shelving unit
Taking my Pyrex display needs into consideration, Ashley gave me a location where it could all be displayed together and gave me a few shelf type options. I fell in love with the suggestion of a wall-mounted unit at once. I could see how streamlined it would look giving everything a place but still being tucked away and wouldn’t interfere with the table and people getting in and out of chairs. She suggested either keeping it the same colour as the table and chair wood or painting it out the same colour as the wall so that the items on the shelf became the main focus. I can’t wait to get started on this piece of the design.

Love the sleek look of this table and chairs
WOW moment #3: Larger Dining Room Table and Lower Back Dining Chairs
Having a fixed-size table can sometimes be a problem if it is on the smaller side and sometimes you entertain larger family and friend groups. Our existing table was a great size for the room in general but didn’t get bigger. In the space plan Ashley showed me the size of the table I could have as an everyday size, which was bigger than what I currently have, and then also suggested investing in one that could expand when needed taking my current seating from six to twelve people. As the room is a little narrow but has high ceilings we wanted the room to feel open and not full of furniture. Ashley solved this problem too by suggesting dining room chairs with lower backs than what we have now, just slightly taller than the table, to create a feeling of openness and space.
Step 5: The End Results
After we went through all the designs and layouts (there was so much to take in!), Ashley left me with my design package and let me know if there were any changes I would like to see she would be happy to make one set of revisions for me. Later that weekend after the presentation, I went through the designs again on my own and was pleased to see how they really captured my design style and addressed my list of design challenges:
Space planning and more seating — All of the designs presented ensured a good flow within the space and increased the amount of seating. The creative solutions they came up with also increased the functionality of the space and enabled me to see how we would live in the space.
Furniture size — All of the floor plans came with the sizes of the furniture which would work in the space taking the guess work out of knowing how it would look or if it would be too big or small. I know this feature alone will save money in the long run by buying the right item the first time.
Vintage Pyrex display space — The design plan answered the questions of where to put it and what to put it on. I am excited to have my collection all together. It will have its own space but won’t take over the whole room.
More lighting — Each of the plans incorporated more floor lamps into the design as a way to increase the lighting in certain corners and areas of the room.
I am looking forward to using this roadmap to help me decorate my space knowing how it will look at the end takes the guess work out of future purchases. It was great to learn the designers at Jostar Interiors can also help source or have custom-built furniture for the space.
Learn more about an Initial Design Consultation